Patient Comparison Window Overview
The Patient Comparison window allows you to compare patient information in Propel Rx with the patient information on the EHR. If any of the information does not match, or something is missing, you can apply EHR information locally into Propel Rx. In some provinces, it is also possible to update the EHR with local information.
Select the applicable tab to learn about the Compare window in your province.
In British Columbia, you can update patient demographic information on PharmaNet using information from Propel Rx or vice versa.
When demographic information is updated in the Patient Folder, the changes are automatically transmitted to PharmaNet upon Save.
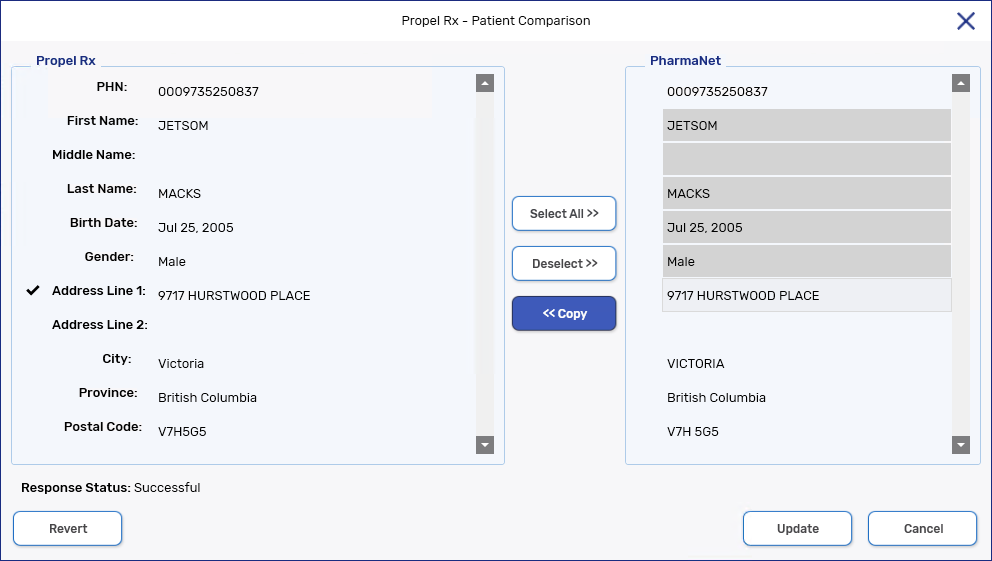
The EHR Profile Compare window is divided into two sections: Propel Rx and PharmaNet. The following buttons are available from the window:
-
Revert - reverts any changes made in the EHR Profile Compare window since it was opened.
-
Select All - selects all fields on the side indicated by the arrows.
-
Deselect - deselects the highlighted fields on the side indicated by the arrows.
-
Copy - copies information over to the side indicated by the arrows. When information is copied over, a checkmark appears beside the field on the applicable side. Information can only be copied one-way per update.
-
Update - updates the EHR or Propel Rx with the copied information.
-
Cancel - closes the EHR Profile Compare window without making any changes.
To update patient demographic information locally or on the EHR:
-
Open the Patient Folder.
-
On the Main tab, select Compare. The Patient Comparison window opens.
-
Select the fields on the Propel Rx or PharmaNet side you want to copy over.
Once a row is selected on one side, any highlighted rows on the other side are automatically deselected.
-
Select Copy. A checkmark appears beside the fields that have been updated.
 Special note about copying the Country
If the Country is anything other than United States or Canada on the EHR, it will be copied over as “Other” in Propel Rx. If the Country is “Other” in Propel Rx, it will copy over as “Other” in the EHR Profile Compare window.
However, in the backend, the Country will default to Canada on the EHR.
-
Select Update. If the EHR was updated, an EHR Response window indicates if the action was successful.
-
Select OK.
-
Select Save.
In Newfoundland and Labrador, you can update patient demographic information on the EHR using information from Propel Rx or vice versa.
When demographic information is updated in the Patient Folder, the changes are automatically transmitted to the EHR upon Save.
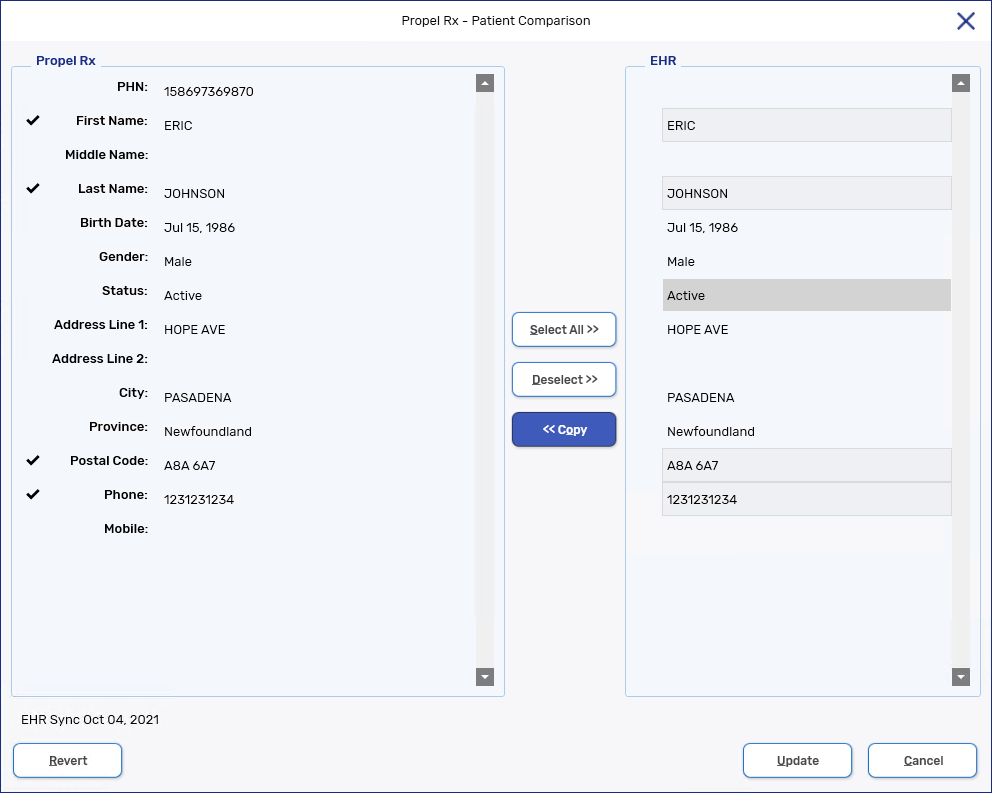
The Patient Comparison window is divided into two sections: Propel Rx and EHR. At the bottom left corner, the patient's sync status is displayed. If the patient is synced with the EHR, the date that the sync took place is indicated. The following buttons are available from the window:
-
Revert - reverts any changes made in the Patient Comparison window since it was opened.
-
Select All - selects all fields on the side indicated by the arrows.
-
Deselect - deselects the highlighted fields on the side indicated by the arrows.
-
Copy - copies information over to the side indicated by the arrows. When information is copied over, a checkmark appears beside the field on the applicable side. Information can only be copied one-way per update.
-
Update - updates the EHR or Propel Rx with the copied information.
-
Cancel - closes the Patient Comparison window without making any changes.
To update patient demographic information locally or on the EHR:
-
Open the Patient Folder.
-
On the Main tab, do one of the following depending on the synchronization status of the patient:
-
If the patient is synced to the EHR, select the Compare button.
-
If the patient is not synced to the EHR, select the PHN expander button
 . A search in the Client Registry is performed. If a search result is returned that matches your patient record, highlight the patient and select Compare at the bottom.
The Patient Comparison window opens.
-
-
Select the fields on the Propel Rx or EHR side you want to copy over.
If the Patient Comparison window is opened from the PHN expander button, you can only copy information from the EHR to Propel Rx.
Once a row is selected on one side, any highlighted rows on the other side are automatically deselected.
-
Select Copy. A checkmark appears beside the fields that have been updated.
-
Select Update. If the EHR was updated, a processing message appears. If a Compare was performed from the PHN expander button, the EHR Sync indicator is updated in the bottom left corner of the Patient Comparison window.
-
Select Save.